What a grey day we had today! I truly felt bad for the poor people who attended the Formula 1 race in Montreal today! But since the weather was not wonderful, I took this opportunity to work on my canning.
I’ve always been a big fan of making everything from scratch, which probably has a lot to do with the way I was raised. I remember that growing up, I did not quite understand why we did not buy yogurt and bread like everyone else… Making your own food can be economical (to a certain extent), but it can also be much more nutritious as you can control the quantities of sugar and fats that go into your product. Over the years, I’ve made a lot from scratch, but last summer I started canning. I bought myself all the necessities and I was eager to start. To be honest, my canning collection was quite small; there were some sweet pickles and sweet relish, a few chutneys, pesto, apple sauce and peaches. The peaches were my favorite and I decided that I would can some every year from now on.
This year, I’m also hoping to can fruit ketchup, tomatoes, peppers, pears and apricots. Since apricot season has just begun I bought myself a few baskets, got some sugar and voila! I was good to go. Unfortunately, apricots were not as easy as peaches to can. If you’ve never canned before, you might want to start with something a little easier like the rhubarb compote I posted a few weeks ago. I should also mention that canning is really a 2 people’s job. There are a lot of steps to follow and you have to be fairly precise, but it’s all worth your time in the end!
Canned Apricots in Syrup
(Bernadin)

3 kg firm apricots
1 teaspoon lemon juice
2 cups sugar
Water (8 cups for the syrup, 16 cups for the anti-browning solution, plus ice water for cooling fruits)
Place the required 8 clean 500 ml mason jars on a rack in a boiling water canner; cover jars with water and heat to a simmer (180°F). Set screw bands aside. Heat sealing discs in hot water, not boiling. Keep jars lids hot until ready to use.
Add sugar to 8 cups of water. Bring to a boil then set aside.

Meanwhile, prepare your anti-browning solution by putting 1 teaspoon of lemon juice in 16 cups of cold water. Set aside.
Wash and blanch apricots: dip into boiling water for 30 to 60 seconds, just until skins loosen.


Transfer quickly to ice water and slip off skins.
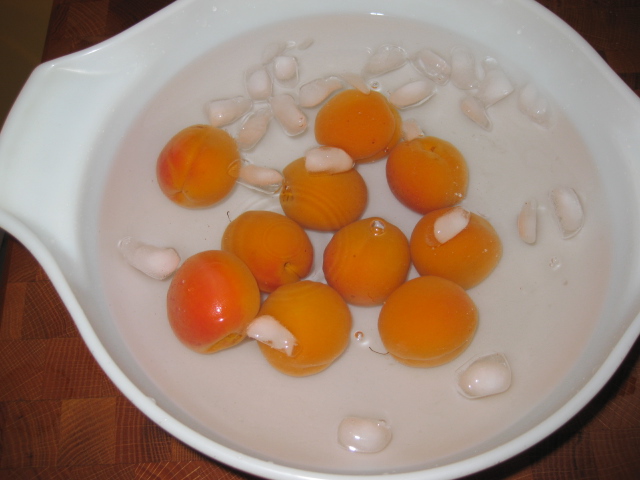
Cut in half; remove pits and slice and place in anti-browning solution.
When all your apricots have been sliced, peeled and put in the anti-browning solution, bring your syrup to a boil then add your apricots.

Pull your mason jars out of the canning pot one at the time,
Drain apricots and pack cavity side down, overlapping layers, into a hot jar to within 3/4 inch of top jar rim.

Add hot canning syrup to cover fruit to within 1/2 inch of top rim (headspace).

Using nonmetallic utensil, remove air bubbles and adjust headspace, if required, by adding more apricots and syrup. Wipe jar rim removing any food residue. Centre hot sealing disc on clean jar rim. Screw band down until resistance is met, then increase to fingertip tight. Return filled jar to rack in canner. Repeat for remaining apricots and syrup.
Place all your jars in the canning pot, boil for 20 minutes.
*When canner is filled, ensure that all jars are covered by at least one inch of water. Cover canner and bring water to full rolling boil before starting to count processing time.
When processing time is complete, remove canner lid, wait 5 minutes, then remove jars without tilting and place them upright on a protected work surface. Cool upright, undisturbed 24 hours; DO NOT RETIGHTEN screw bands.
After cooling check jar seals. Sealed lids curve downward and do not move when pressed. Remove screw bands; wipe and dry bands and jars. Store screw bands separately or replace loosely on jars, as desired. Label and store jars in a cool, dark place. For best quality, use home canned foods within one year.

No comments:
Post a Comment